Friday, April 22, 2011

Carrot Cake

I love making carrot cakes! I found a recipe a few years ago, and since then I have modified it. The recipe I use now is one that I have changed and made my own.

I consider myself a carrot-cake-converter...if you have never heard of such a person, let me explain...I convert people to lovers of carrot cakes. A lot of people I have met say that they do not like carrot cakes. I am not sure if this is because they have had bad carrot cakes in the past or maybe the thought of actual carrots in a baked good weirds them out....who knows....

...I do know that once these people try my cake, their minds are changed! I convert them! Hence the name: Carrot-Cake-Converter.

Here goes the recipe:

Begin by putting peeled, washed, and chopped carrots into a food processor. (Back when I first began making this cake, I used to grate the carrots by hand! I would not recommend that unless you want orange fingers, little cuts from the grater, and a sore hand. But, if you do not own a food processor, you will have to use a grater.) 

You want 2 cups of carrots. This usually takes about 4-5 large carrots. Again, I am the worst at measuring so you will have to try it and see. 


 The carrots should look like this after they are processed. 

 Next, add half a can of crushed pineapple (without the juice) and 1 individual cup of cinnamon apple sauce to the food processer. Process this until mixed well. 

One way to lessen the calories in baked goods is to use apple sauce in place of oil. I do not completely cut out the oil from this cake, but I use less. I also find that apple sauce adds moisture. 

When using apple sauce, it is easiest to use individual cups, because 1 of these cups is equal to 1/2 a cup of oil. 

I also use the cinnamon kind, because I am a cinnamon fanatic. If you are not too keen on cinnamon, use the normal kind. 

 Once you have processed the apple sauce and the pineapple, add it to carrots. Next add 4 eggs. 

 After you mix in the eggs, add 1 cup of vegetable oil. 
Next add 1 teaspoon of nutmeg and 1 tablespoon of cinnamon (I told you I was a cinnamon fanatic!) Again, if you do not like cinnamon as much as I do, add less. 

 Next add 2 cups of sugar. 

 Lastly add the dry ingredients. 
In a seperate bowl, mix together 2 cups of flour, 1 teaspoon of salt, 2 teaspoons of baking powder, and 2 teaspoons of baking soda. 

Add the dry ingredients and use a hand mixer to thoroughly combine. 

Once mixed, pour half the batter into a round pan (that has already been thoroughly greased and dusted with flour). You wil need two round pans that are the same size for this recipe. If you do not have two of the same pans, you will have to bake one cake and then the other using the same pan. 

Half the batter will be used in one cake and half in the other. You want to end up with two identical cakes that will be stacked on top of each other. 

Bake the cakes at 350 degrees for approximately 20 minutes or until the tops are set and a tooth pick inserted into the middle comes out clean. 

Once the cakes are done, run a knife along the edges. Then let stand until completely cool. 

After the cakes are cooled, place one cake on a platter. Spread cream cheese frosting generously on the top. Then top with the second cake. Ice the entire cake with cream cheese frosting. Last, cover the sides with chopped walnuts. 


Carrot Cake

Ingredients:
2 cups finely grated carrots
1 individual cup cinnamon apple sauce
4 eggs
1/2 can of diced pineapple
1 cup vegetable oil
1 tbsp cinnamon 
1 tsp nutmeg
2 cups sugar
2 cups flour
1 tsp salt
2 tsps baking powder
2 tsps baking soda
Chopped walnuts


Sunday, April 10, 2011

Teacup Cake

You read in my last post that we were celebrating my Mumma's (I call my mom that) 50th birthday. In honor of that I made her a cake from scratch. I love to bake and I am pretty well-known for my carrot cake.  My mom requested a carrot cake so that is what I made. But I did not make the cake the classic way, I made it into a teacup shape! Mumma and I love drinking tea, and we visit my Auntie Donna once a week to have tea with her. My Auntie Donna and I threw the party together so I thought the teacup was very fitting.

In this post, I will give the recipe for buttercream frosting, which I used on the cake. I will also feature photos of the cake. In a later post, I will feature the carrot cake recipe with the classic look.

To make the buttercream, I used the Wilton's recipe, which can be found online on their website.


I got to use a Kitchen Aid stand mixer for this! I was in heaven!! If any of you want to buy me one, I will love you forever!! Okay now to the recipe! 
Begin by beating 1 cup of vegetable shortening. If you do not have a stand mixer, a hand mixer will work as well.


Next, add 1 cup of butter (2 sticks). Mix until smooth. 


Next add in 4 tablespoons of milk and 2 teaspoons of vanilla extract. 


Next, add in the powdered sugar. I am doubling the recipe in this post, so you need to add 8 cups of powdered sugar. Add it in 1 cup at a time! 

Watch this video to find out why! 

 The icing should look like this when it is done. It should be smooth with no lumps!


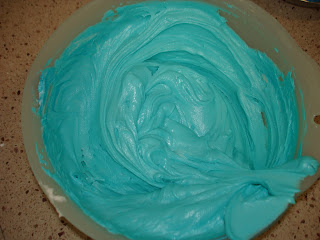
Next I took part of the buttercream and dyed it with royal blue dye. Add a bit at a time and mix.


After it was all mixed, it was this color. Remember: if you add a lot of dye to make a dark color, the people who eat it may have their mouths dyed that color!


The other half of the buttercream I dyed sky blue.
Here is the finished product:

 I bought sugar pearls and put them on one by one with tweezers. It was a process, but alhamdulillah, in the end my mom loved the cake! It was worth it! 

Happy Birthday!!!

Saturday, April 9, 2011

Mumma

Today, I am throwing a 50th birthday party for my mother. This post is dedicated to her. 


My mother is my best friend. Ever since I was a little kid, I remember being close to my mom. My siblings and I used to fight over who would sit next to my mother on the couch. We had to develop a schedule so no one could accuse the others of being unfair. If I didn't see my mom is the house, I would call her name until she responded. I never had anything to say to her, I just needed to know that she was there. I wrote my college essay about how I developed my sense of hard work, my strength, and my moral character from my mom. (I got into every college I applied to, so it must have been good!)


Since becoming an adult, I feel even closer to my mom. I appreciate everything she has done for my siblings and me, and she is a role model as a mom and as a teacher for me.
My mom and I are almost the same person. I remember when I was about 19, I was staying with my aunt in Florida and in the middle of something I was saying, she just looked at me and said: "You look just like your mother, the way you talk and move, I feel like I just saw her." By looking at the pictures on this post, you can see that we don't particularly resemble each other physically. But we are almost identical in our mannerisms. I talk the way she does, gesture the way she does, and even catch myself saying things she always says. For example, a few weeks ago I was watching my second graders run around at recess. One of them came up to me and said "Omar is chasing me!" I looked at her and simply said: "If you don't run, he can't chase you." My mom said that exact same thing to me every time I complained that my brother was chasing me as a child! And I hated it, because my response was always "If I don't run, he will get me!"  I am even saying things that I didn't like my mom saying to me as a child!
My mom and I finish each other's sentences. I can tell exactly what she is thinking by looking at her face. I can even anticipate what she is going to say before she even says it. 

I love my mom more than words can express and I am so thankful for her. I hope inshaAllah that I can be as great a mom as she is someday. 

Happy Birthday Mumma!


Thursday, March 31, 2011

Requests please!!

I started this blog for a number of reasons...ranging from me wanting to share my passion with the world (or whoever actually reads this), to wanting a place to write whatever I wanted about whatever I wanted, to wanting to help people add spice (no pun intended) to their culinary lives, to wanting to challenge myself to refine my culinary skills, take chances, and add new dishes to my repertoire.

This post is dedicated to my faithful followers and aimed at helping you add spice to your lives. There are a number of dishes I am known for...these are the dishes people ask me to make for events or expect as standard at all my parties. I hope to eventually upload recipes for all these dishes, but I want to know which ones you all would most like to know how to make! If there is something you have had that I have made and you want to know how to do it, add a comment and I will try to get to the dishes as soon as I can!

I love to bring others joy in the form of food, and this way I will be helping you spread the joy around! So comment please and let me know what to post next!

Lamb & Bean Stew

I originally found this recipe on Bon Apetit's website, which always features amazing cooking ideas. After going through the ingredients, I realized I did not have a few things that it called for, but I decided to just make the dish leaving out whatever I didn't have. The stew originally calls for cabbage, but I unfortunately did not have any so my version has none. Also, for any of you that know me, you know that I never follow recipes exactly! I am not a very artistic person...I cannot draw to save my life and I'm musically-challenged, but I excel in one art form: cooking. To me, cooking is an art and art must not be confined. So I often add my own touches to recipes and alhamdulillah they usually come out really great. That is what I did with this...I am going to give you the recipe for what I actually did, it is not the original one.

So here we go!

Toast the caraway seeds and coriander seeds in a small skillet on medium-high heat. They should toast until you can smell the aroma in the air. Be careful not to burn them! 

Transfer the toasted seeds into a mortar and pestle (isn't it such a beauty?!) or a spice mill and grind until it is a a fine powder with no chunks. 

Coat cleaned lamb with the coriander and caraway seed mixture as well as turmeric, coarse salt, dried mint, garlic powder, and 1 tablespoon of olive oil. Cover this and let marinate. The longer you let meats marinate, the deeper the flavors can set in and the yummier they taste. So these first steps can be done the night before. 

 After the lamb has marinated for a good amount of time, remove from the fridge and set aside. Coat a large pot with 1 tablespoon of olive oil. When the oil is hot, put lamb and 1 chopped onion in. Cook until the lamb is browned and the onion is soft. 

 When the lamb has browned, add a can of diced tomatoes (I used the ones with onion and garlic, because I love garlic) and 2 cups of tomato puree. Also add 2 bay leaves, 1 cinnamon stick, and more garlic (I used garlic powder because I was out of fresh garlic). 

 Cover and bring to a boil. 
Once it is boiling, remove the cover and add 2 cups of water. Also add a large bunch of chopped cilantro,  2 teaspoons of turmeric, 2 teaspoons cumin, 2 teaspoons allspice, and salt to taste. Turn the heat down to low and let it simmer. It should cook on low until almost all the water is gone and there is just a thick sauce. 

 Once the water has cooked down, add 2 cans of cannelini beans that have been drained. 

 Let this simmer for about 15 minutes until the beans soften and soak up the sauce. 

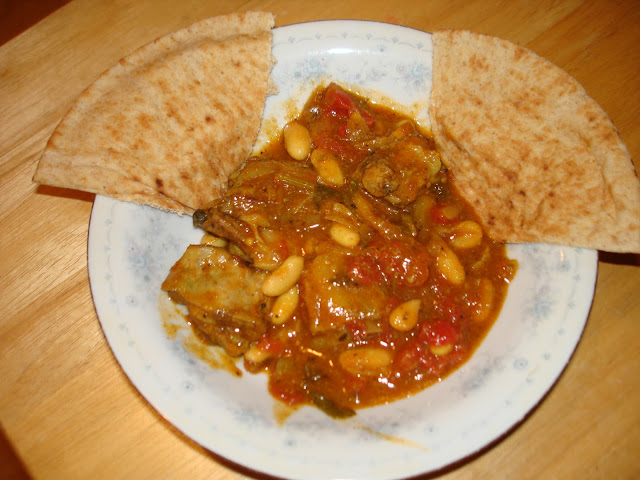
 You can serve with either Arabic bread (which is what I ate it with for dinner) or rice (which is what I had it with the next day). 


It has a Mediterranean flavor to it and it is extremely comforting. Sit back with a bowl of this and you will be very satisfied!

Lamb & Bean Stew (Written Recipe)

Ingredients:
Chunks of lamb meat (whatever kind you want to use)
Lamb Seasonings:
1 teaspoon caraway seeds
2 teaspoons coriander seeds
1 tablespoon olive oil 
2 teaspoons turmeric
Salt
2 teaspoons garlic powder
1 teaspoon dried mint leaves

Stew: 
1 can of diced tomatoes (I used the ones with onion and garlic in it)
2 cups tomato puree
2 bay leaves
1 cinnamon stick 
1 tablespoon garlic powder (or fresh garlic)
1 onion (chopped)
2 cups of water
Large bunch of chopped cilantro
2 cans of cannelini beans
Salt to taste

Serve over rice or with Arabic bread. 

Wednesday, March 30, 2011

Mortar & Pestle

Back around my birthday, my sister asked me what I wanted as a gift. I began to think of things I would like and finally decided on the perfect thing....a mortar and pestle!! For those of you who are saying "a what and a what?" ...let me show you!!


This amazing piece of marble is a must-have for any serious cook...and now, I am the proud owner of one!! I could not be more excited!

Thank you Fiyah for an amazing gift!

Sunday, March 20, 2011

Training in Progress!

So I started my half marathon training 2 weeks ago...I know, I know....I was supposed to start earlier but I was busy and the weather was just blah! I had no motivation to get my bum out of the house and trek through the bitter cold to the gym. Thankfully, the weather has gotten better and the 1/2 marathon date has been getting closer so I finally started training.

It has been amazing so far! There is something so empowering about having a plan and sticking to it. Every time I complete a workout, I cross it off the list and feel a little bit more amazing =)

I just got in from a run and I feel great! I do some of my best thinking out there on the road. I love the smell of the fresh air, the wind against my face, and the clarity that the mix of endorphins and sweat brings ;)

For those of you who run, do you ever feel like you get to a point during your run that you feel like you could go forever? For me, the beginning of the run is the hardest. My body is screaming at me to stop and it takes me a bit of time to get my breathing regulated. But after that first mile, I feel like I reach a point where I feel invincible. My body no longer hurts, my breathing is back to normal, and I get this endorphin high that propels my feet to move faster. I love this feeling!

If you haven't ever ran, you should try it! Get past that little voice in your head that is telling you that you can't do it. Believe me, anyone can do it! I have seen old men and women running during some of my past races. The human body is an amazing thing and it really can do whatever you challenge it to!

Wednesday, March 9, 2011

Sophia's Hummus

I recently visited my dear friend Sophia in Tampa. Sophia and I met during my freshman year of college (almost 5 years ago now!) I could go on about how wonderful she is all day (mashaAllah), but the main thing you need to know about her is that she is one of the kindest people I know. She lives her life trying to be the best woman, mother, and Muslimah she can be. She is a role model for me.

On previous visits, Sophia had made me hummus and I loved it. So this time, I asked her to teach me how she does it.

The recipe is very simple, but very delicious. It is for plain hummus, but anything can be added to jazz it up.

Begin with can of chick peas, tahini, garlic, and a lemon. 

Pour the water at the top of the can of chickpeas into a cup. Save this in case you need to thin out the hummus later. 

Pour the chickpeas and the water that remains around them into a food processor. Then add in approximately 1/2 a cup of tahini (Sophia cooks much like I do, not really measuring things but eyeballing it. We used the amount of tahini shown in the picture, which I think is approximately 1/2 a cup)
Process the chick peas and tahini together until they form a paste. 

Then add 1 peeled clove of garlic and the juice of half a lemon into the mixture. Make sure there are no seeds in the mixture! They will make your hummus bitter. 

Process this together until the lemon juice and the garlic have been incorporated. Lemon juice and tahini thicken each other when they interact, so your hummus should thicken a bit. 

Once the mixture is smooth add salt to taste. 

Pour the hummus onto a plate and sprinkle with paprika and cumin. Then drizzle with olive oil. 

Enjoy! 


Sophia's Hummus (Written Recipe) 
Ingredients: 
1 can of chick peas
1/2 cup of tahini
Juice of 1/2 a lemon 
1 clove of garlic
Salt to taste
Paprika, cumin, and olive oil to garnish

Directions:

1. Put all the above ingredients in a food process. Process until it forms a smooth paste. 

2. Sprinkle with paprika and cumin then drizzle with olive oil. 

Thursday, February 17, 2011

Happy Birthday to Me!!

22 years ago today, I was born on a cold February day. 

I cannot believe how fast time passes....subhanAllah. 

This past year has been a wonderful year, alhamdulillah. It has been full of endings, new beginnings, happiness, and wonderful memories. 

This post will be a sort of year in review, high lighting all the best times of the past year. So here it goes (not in any specific order): 


1. I graduated from Boston University with my bachelors in Early Childhood Education. I had 4 amazing years at BU, and they all came to a close last May. I miss my amazing professors, wonderful friends, and Comm Ave! 


2. I became a certified teacher!! I got my MA state license after graduating and passing 3 tests! I am now a professional =) 

3. I saw 9 more U.S. states!! Over the summer my mom, sister, cousin, and two aunts went on a road trip around the south and the midwest. We hit up sites in Tennessee, Kentucky, Missouri, Nebraska, Iowa, Arkansas, Kansas, Alabama, and Mississippi! We saw some things I had heard of prior to the trip and some things I had never heard of in my life! All in all, it was great! 
Rocking out at the Grand Ole Opry - Nashville, TN

Gateway Arch!! - St. Louis, Missouri

Little Rock, Arkansas

Catching up with Rachel on Beale St - Memphis, TN


4. Two of my best friends got married!! 

My friend Rachel tied the knot first at a beautiful inn in Connecticut. Rachel and I met freshman year at BU. We both studied early childhood education and had most of the same classes. She and I would meet once a week for dinner during our student teaching, catching up, bouncing ideas off each other, and offering any support we could. I cannot imagine what BU would've been like without Rachel. It was an honor to attend her beautiful wedding. I could not have been happier for her and her husband. 


Then two months later in October, another one of my best friends, L.S.D., got married. She and I also met while attending BU. She is one of the most amazing women I have ever met. She is the epitome of strength, hard work, and beauty. (Check out her blog http://appledaysarmynights.blogspot.com/ She is amazing!) L.S.D. gave me the honor of being a bride's maid in her wedding. It was a wonderful day, a wonderful weekend, and a time I will never forget. 


5. I started teaching 2nd grade! I am currently teaching 22 seven and eight-year-olds. They are amazing, smart, and exhausting! Everyone says the first year is the hardest....we shall see... I will report back next year ;) 

6. My best friend in the whole entire world had a beautiful baby daughter!! My friend Fatimah gave birth to her first daughter on October 25th. She is the most adorable little girl I have ever met mashaAllah, just like her Mama! I am looking forward to some amazing times with her inshaAllah. She is probably the best thing to happen in the last year! I love her so much already and I have known her less than 4 months! I guess since her mom means so much to me, I feel so connected to her.

7. My cousin is moving to New England! My cousin Kristen has lived in Atlanta her whole life. I have seen her probably twice a year since I was born, but we have never lived in the same area for a long period of time. But that is all changing come August! She recently got a job to teach in Connecticut and will be moving up here!! All I gotta say is...bring some warm clothes....

8. I have made two amazing new friends, both of whom are amazing women. I met Rusha a few years ago, but in the last year we have become very close. She is a gorgeous, extremely caring, good-hearted person who I am lucky to have in my life. I am also lucky to have met Heba! Heba and I met at a BBQ last summer and have been friends ever since. She and I have realized we're soul mates. It always amazes me when you meet someone and there is an instant connection subhanAllah. I love you both!!

There have been many other great times in this past year alhamdulillah. I am very thankful for all God has blessed me with. I look forward to a year full of more great times and inshaAllah next year I will have even more wonderful memories to recount. 

Saturday, February 12, 2011

Jammies!!

Last weekend my mother and I were driving home from Sunday breakfast at my uncle's house when we saw a sign for a farmer's market in our neighborhood. We were both kind of skeptical, because we had never heard about a market in our neighborhood in the 6 years we have lived in our house, and also because it is February in Massachusetts! What kind of produce grows locally at this time of year?! Despite our skepticism, we decided to follow the signs to the local garden center and investigate.

We walked into a little indoor store, which we never knew existed, and saw a market. But much like I expected, no fresh produce. There were tables set up with different people selling things like granola, decorated cookies, spices, cheeses, and JAM! You may be wondering why I wrote the word jam in capital letters...well, let me tell you... I recently found a recipe for little jam filled heart cookies that I wanted to try out, and I had found one of the key ingredients! I did have regular, brand name jam in my refrigerator at home, but the delicious, real fruit taste of this homemade jam was too good to pass up.

I decided to buy the sugar free strawberry jam, because it was extremely sweet, fresh, and tasted like real strawberries.

Here is the jam I bought:
This jam was delicious! If you would like to buy some, follow the web address on the jar! The company is out of Plymouth, MA. 

I paid my 5 dollars and clutched my jam tightly the whole way home. I have never been more excited to buy a jar of jam in my life! The jam sat on my counter all week just waiting to be used in the delicious cookies, and today it finally fulfilled its destiny.

In the cookbook I have, the cookies are called Jammie Bodgers, but I hate that name. I have never heard the word bodger in my life, so I decided to cut it out and just call them Jammies! The word jammies reminds me of my mom, because that is what she calls pajamas. So this new name makes me happy =)

So here you go: Jammies!

Dice up 3/4 cup of unsalted butter (1 and 1/2 sticks). 

Add the butter to 2 cups of flour in a food processor. Pulse until the mixture resembles breadcrumbs. 
Then add 1 egg yolk and 2/3 cup sugar. Process until this resembles a dough. 

If you do not know how to separate an egg yolk from the white, watch this video to learn! 


Here is what the dough should look like! 
After the mixture resembles a dough, dump it onto a lightly floured surface and knead until it forms a dough ball. 

Cover the dough ball in plastic wrap and refrigerate for at least 30 minutes. 

 After 30 minutes, remove the dough from the fridge. Roll out on a lightly floured surface until it is all one thickness. Then use whatever cookie cutter you would like. I wanted circular cookies, but do not own a circular cookie cutter, so I used the top of the the cup in the picture. It worked wonderfully! 
Once you cut out all the cookies, remove the surrounding dough carefully. 

Then use a smaller cookie cutter to punch a design in the center of half of the cookies. In honor of Valentine's Day (which is on Monday), I decided to use a heart. Once the heart is cutout, carefully use either a spatula or a dough cutter (which I used) to remove the pieces from each other. 

You will need an even number of cookies, half with hearts cut out and half that are complete. You will be making sandwiches, so you need a mate for each cookie. 
Place all the cookies on an un-greased cookie sheet and bake at 350 degrees for about 10 minutes. You want the tops to be slightly golden. 

Remove the cookies from the oven and let cool. They should look like the ones below. 

 I made very large cookies, so I only had 6 sandwiches total. (12 sides + 1 extra that we ate by itself). If you made smaller cookies, like the recipe said to, you would have many more cookies. 

Once the cookies are completely cooled, you can assemble them. Make sure you let them cool, because if you do not, the frosting will melt and make a big mess! 

While you are waiting for the cookies to cool, you can make the buttercream icing! 
In a bowl, mix 1/4 cup unsalted butter (1/2 a stick), 1 cup powdered sugar (also called confectioners' sugar), 1/2 teaspoon pure vanilla extract, and 1 tablespoon of milk. With a hand mixer, mix until it looks like icing. That's it! The buttercream icing is done and you're ready to assemble your cookies!

Begin by frosting the sides without the hearts cut out. You should completely cover the inside of the cookie in buttercream. (Remember you are making sandwiches, so don't frost the tops!)

Next, place about one spoonful of jam on the cookie. Spread out until it covers the entire inside of the cookie. 

Last, place the other cookie on top and press down lightly. There you go, your jammy is done! 
Let sit for about 30-45 minutes to let the jam set a bit. 


The cookies were delicious! The combination of the lightly sweet cookie, the fruity jam, and the buttercream icing is perfect! 

I brought each of my 3 cousins a cookie to try, and with full mouths, they all gave me overwhelming approval! It sounded something like "mmm....so good....mmmm" =) 

Jammies (Written Recipe) 
Ingredients: 

Cookie Dough: 
2 cups flour
3/4 cup unsalted butter
2/3 cup sugar
1 egg yolk

Buttercream Icing: 
1/4 cup unsalted butter
1 cup powdered sugar (confectioners' sugar)
1/2 teaspoon pure vanilla extract
1 tablespoon milk 

Filling: 
Strawberry Jam 

1. Put the flour and butter in a food process. Process until it resembles bread crumbs. Then add the egg yolk and the sugar. Process until it resembles a dough. 
2. Dump the dough onto a floured surface and knead into a ball. Cover the ball with plastic wrap and let sit for at least 30 minutes in the refrigerator. 
3. After 30 minutes, remove and place on a lightly floured surface. Roll out until the dough is all one thickness. Use a cookie cutter to cut out 12 cookies (more if your cutter is smaller than mine was). Use a different cookie cutter to punch out shapes in the center of half of the cookies. 
4. Carefully place all the cookies onto cookie sheets and bake at 350 degrees for about 10 minutes or until the tops look slightly golden. Then remove from the oven and let cool. 
5. Combine all the ingredients for the buttercream in a bowl. Use a hand mixer to mix until it looks like frosting. 
6. Once cookies are cool, assemble. Frost the halves that do not have shape punched out. Then place 1 spoonful of jam in the center. Top with the other cookie (with the shape punched out). Press down lightly. Let sit for 30-45 minutes. Then enjoy!